![]()
RS-232 using an USB converter
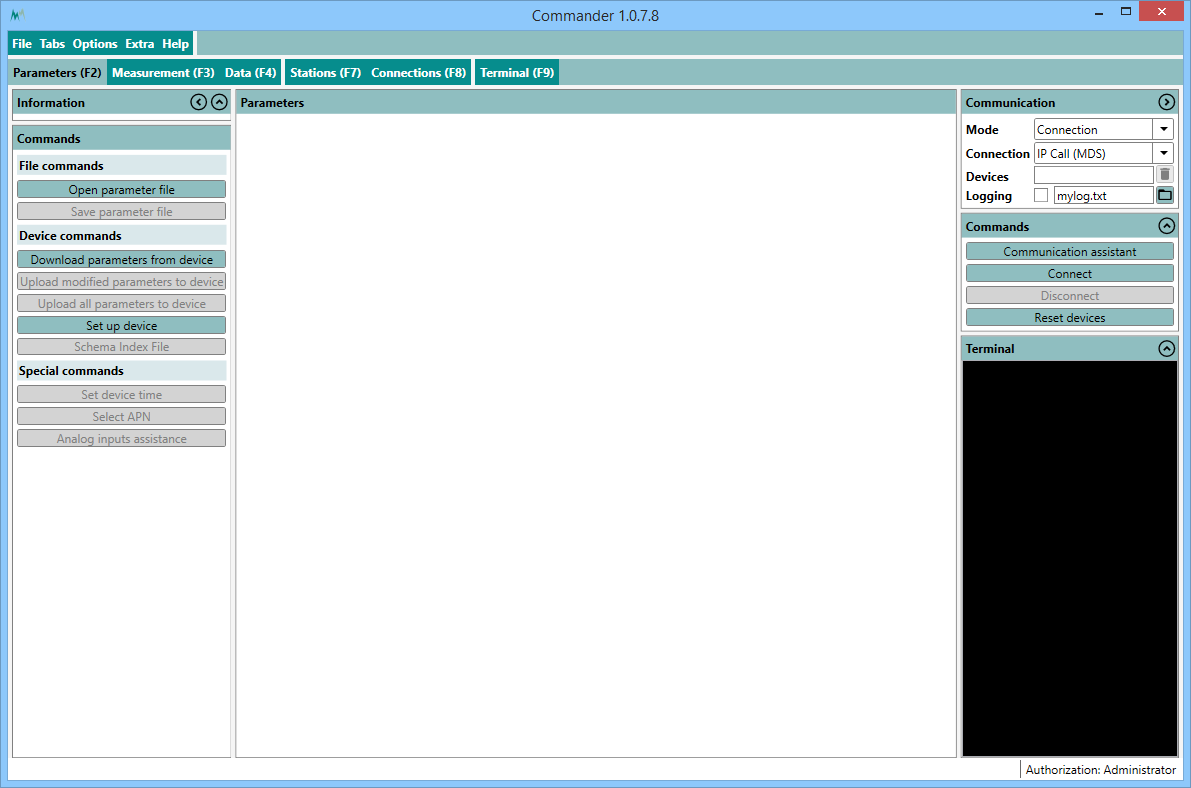
Perform the following steps to set up the communication between the MRL-6.1 and your PC:
- Install the Commander software on your PC.
- Connect the provided USB to RS-232 converter to your PC. If required, install the driver of the USB to RS-232 converter.
- Start the Commander software.
-
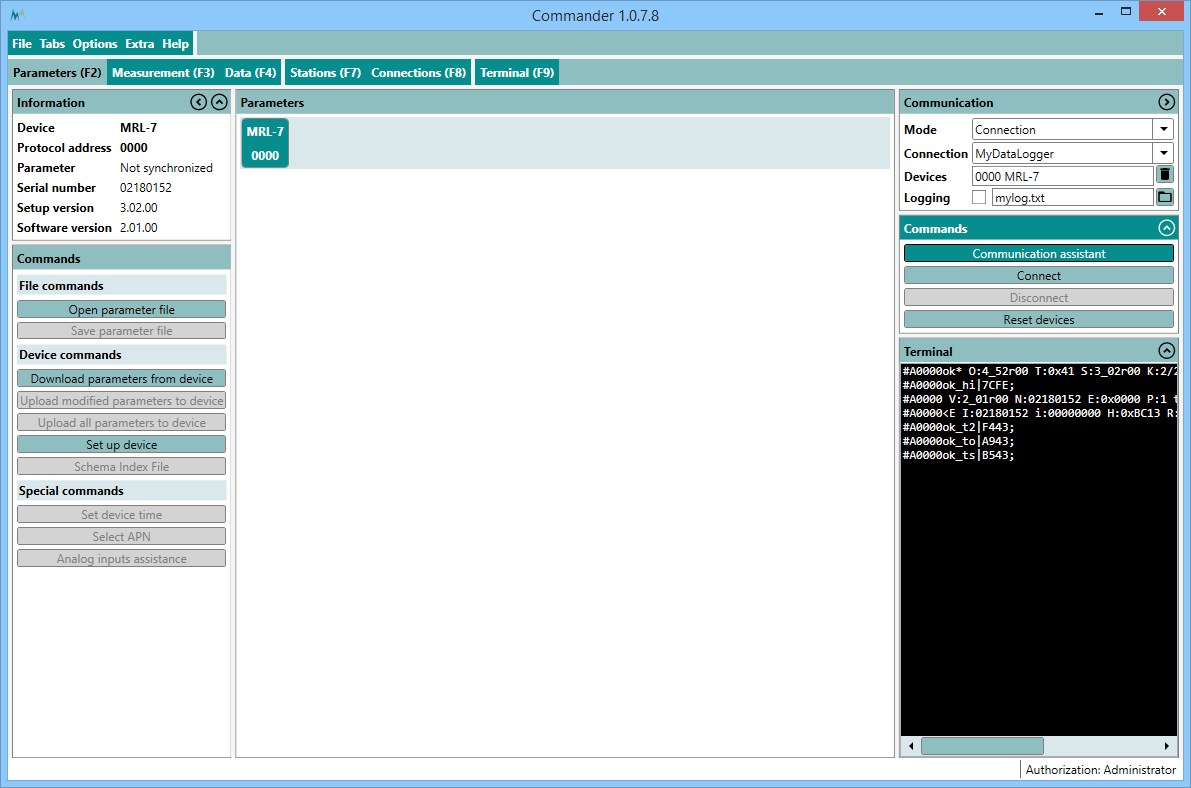
Click on Communication assistant on the right-hand side of the Commander window.
-
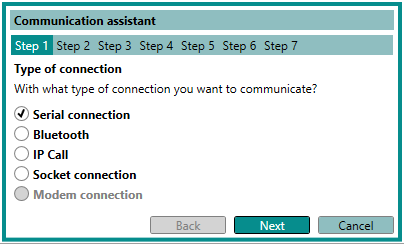
Select Serial Connection and press Next.
-
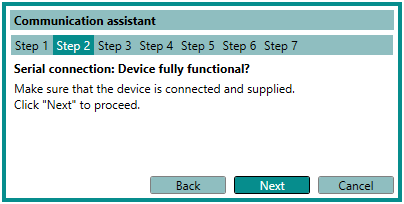
Make sure the MRL-6.1 is powered either by internal or external batteries and press Next.
-
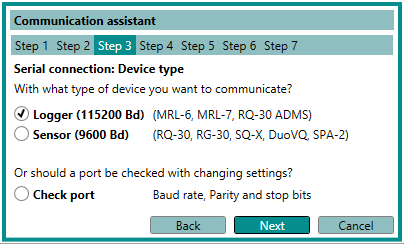
Select Logger (115200 Bd) and press Next.
-
Either tick Connection and select a previously configured connection, or tick Select port and select the COM port that was assigned to the USB/RS-232 converter; then click Next.
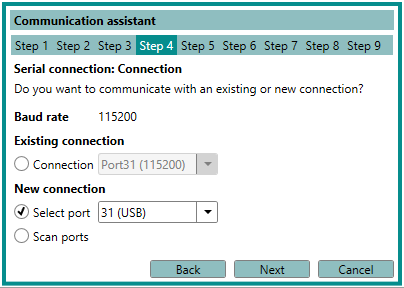
If more than one COM ports are listed and you are not sure which one to select, open the Windows Device Manager (press Windos-key and type device manager) and expand the menu Ports (COM & LPT). By unplugging and re-plugging your USB/RS-232 converter you can identify the number of the desired port.
-
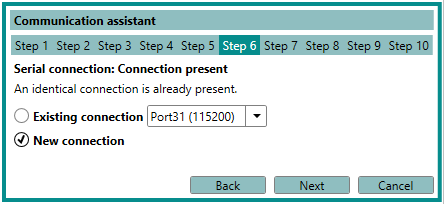
Select New connection and click Next.
-
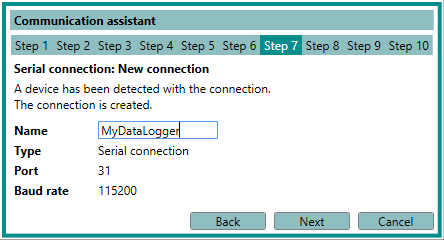
Assign a name to the connection and click Next. The software now searches for connected devices. This procedure can take several seconds.
-
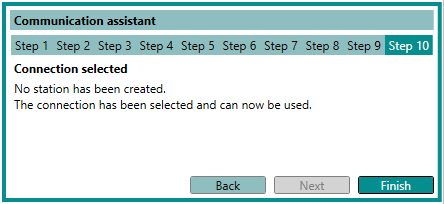
Select if you want to create a new station. If yes, assign an appropriate name. If a station already exists, it will be recognized and automatically selected.
-
Click Finish. Upon completion, the newly created connection is displayed in the Communication section of the Commander.
-
Click Connect to open the connection with the data logger. If the connection was successful a green icon is displayed at the top-right corner of the Commander window.
All configured connections can be viewed under the tab Connections (F8).
Alternatively, a connection can be configured manually; please consult the Commander manual for detailed instructions.